07 March 2010
04 March 2010
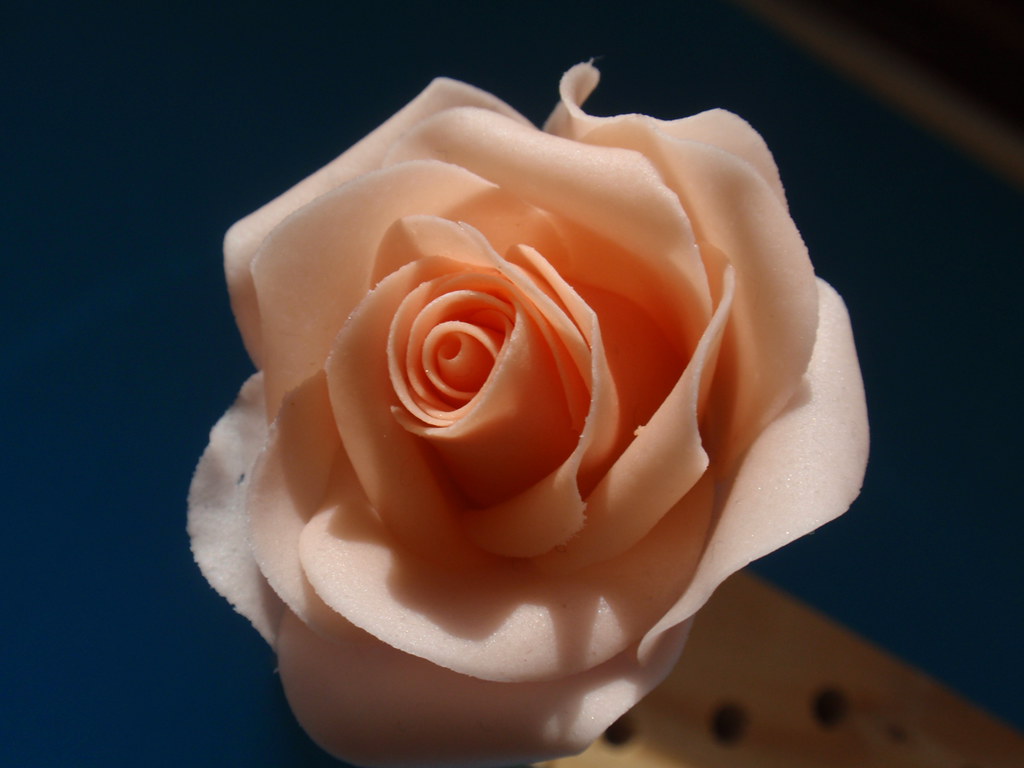
Making a full sugar rose.
Making a Sugar Rose
Cut a 20 gauge wire in 3. Make a hook at one end.
Roll a piece of white flower paste into a cone shape and insert the hooked end of the wire into the cone. The size of the cone should be two thirds high of the petal cutter you will be using. Leave to dry for a day.
Colour some flower paste peach using paste colour.
1st layer. Roll out a small amount of paste very thinly. Cut out 2 petals using the rose petal cutter.
Soften the edges of the petals using a ball tool on a celpad.
Put a small amount of glue all over each of the petals.
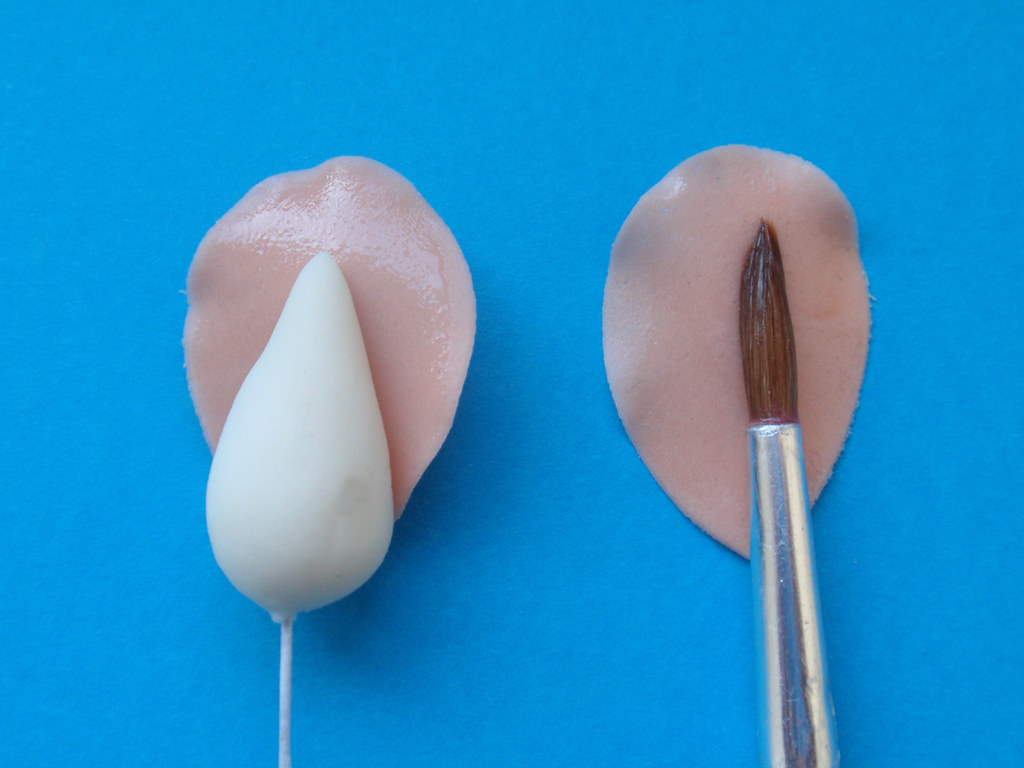
Wrap one of the petals all round the cone. The top of the cone should not show and the petal wrapped all the way round tightly.
Lay the cone with the first petal on top of the 2nd petal with the join of the first petal facing downward. The top of the first petal should line up with the top of the second petal exactly.
Wrap the second petal tightly around the first petal.
Second Layer
Roll out another 2 petals. Thin the edges and apply glue in the shape of a “V” at the bottom of the petals.
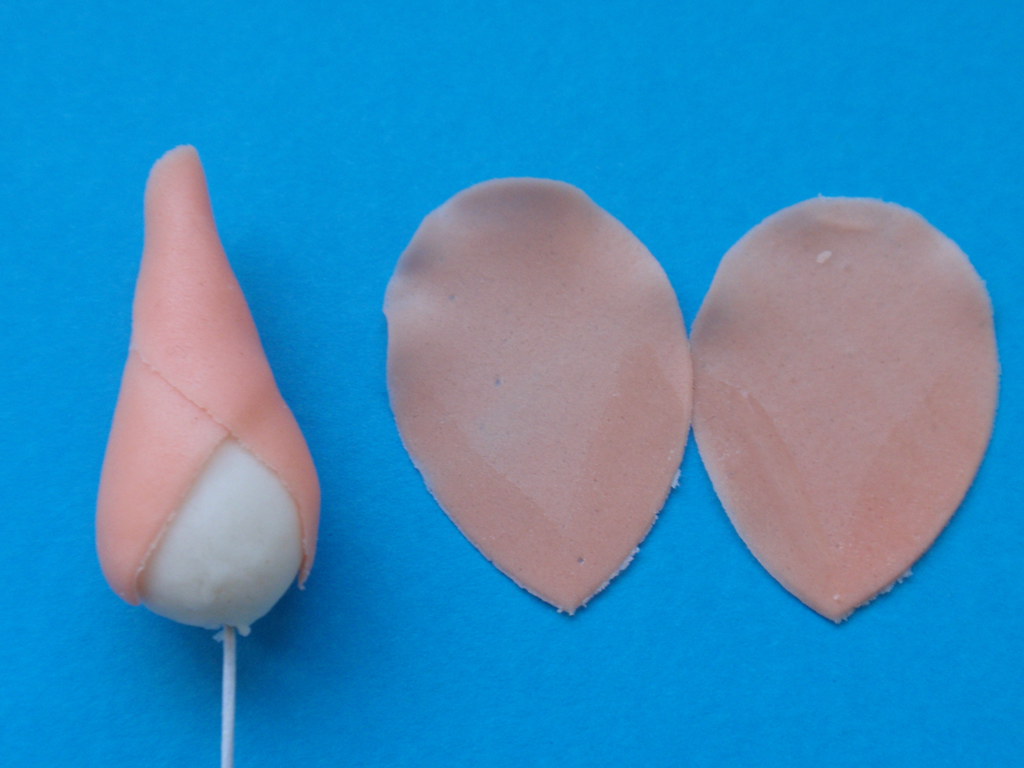
Lay the cone with the first layer petals, on the side of one of the petals making sure that the tops are level. This should enable you to pick up the glued petal.
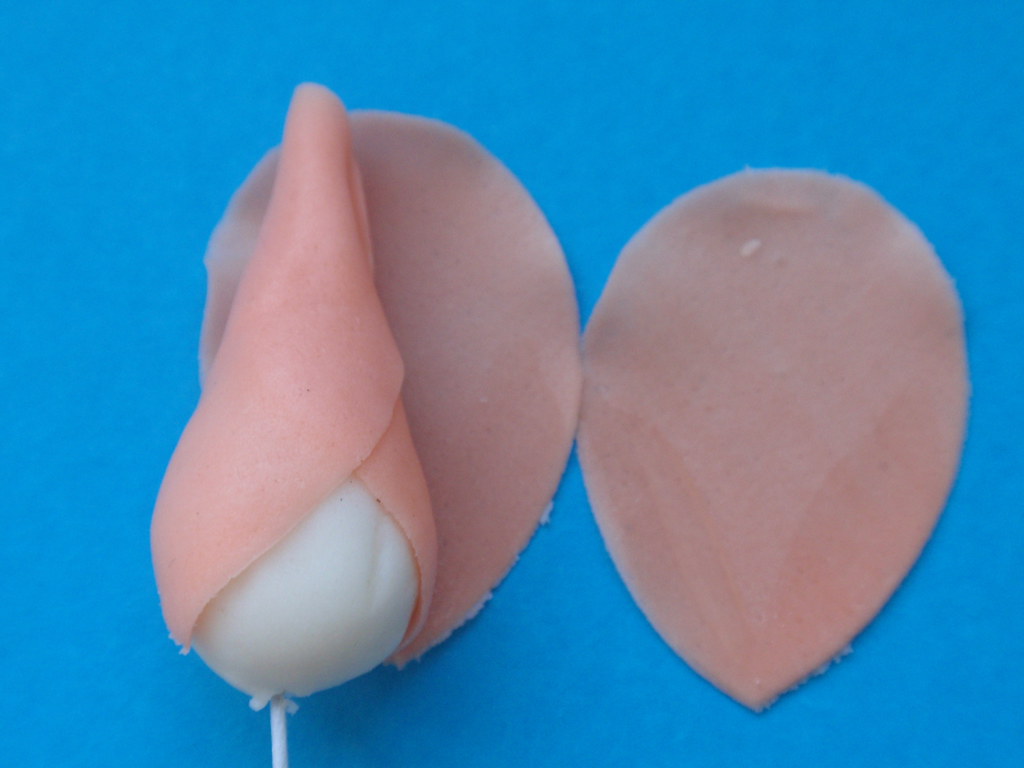
Turn the cone over so that the petal that has been picked up is now on the top. Lay the cone on the next petal and pick up the petal. You should have 2 petals which have not been wrapped around the cone as yet.
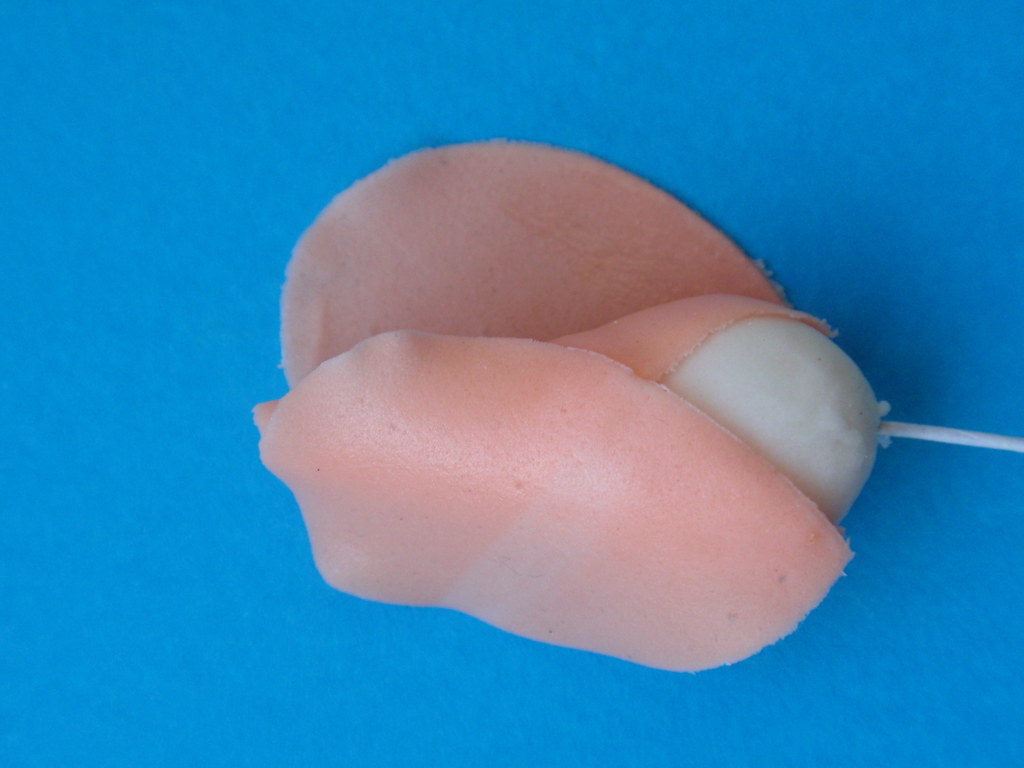
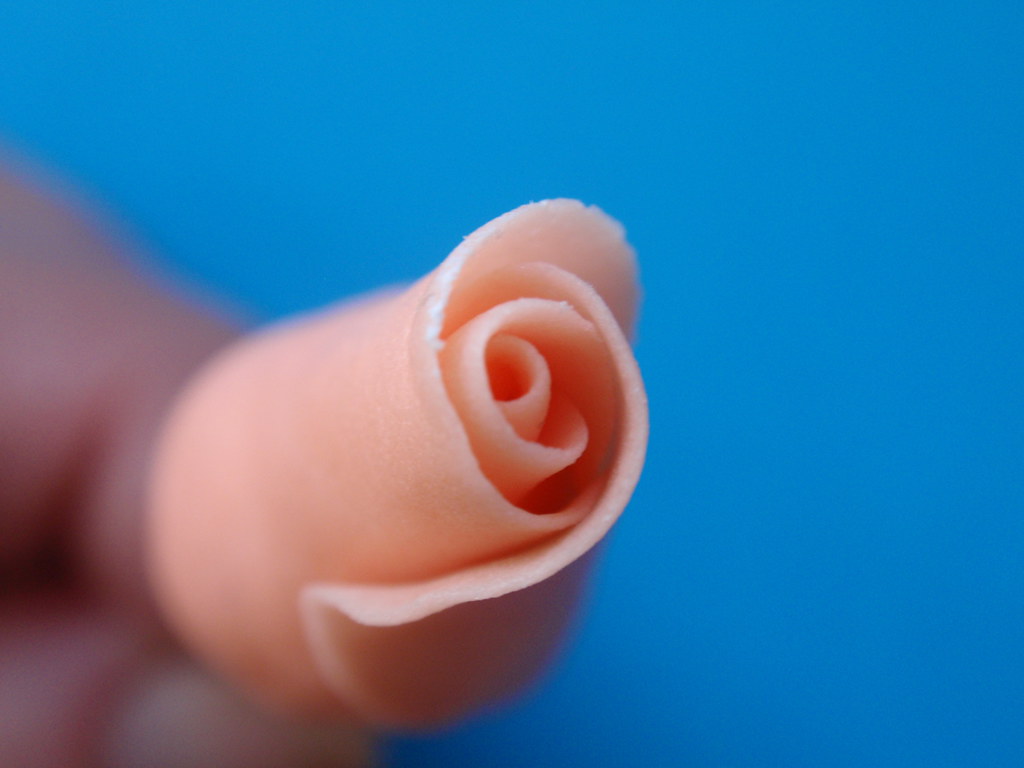
Wrap petals tightly round each other to make a tight bud.
This is how the top of the rose should look like from the top.
Layer No. 3
Lighten the colour by adding white to the remaining paste. For this layer you will need 3 petals of the same size, cut, thinned round the edges and glue applied to the bottom v of each petal.
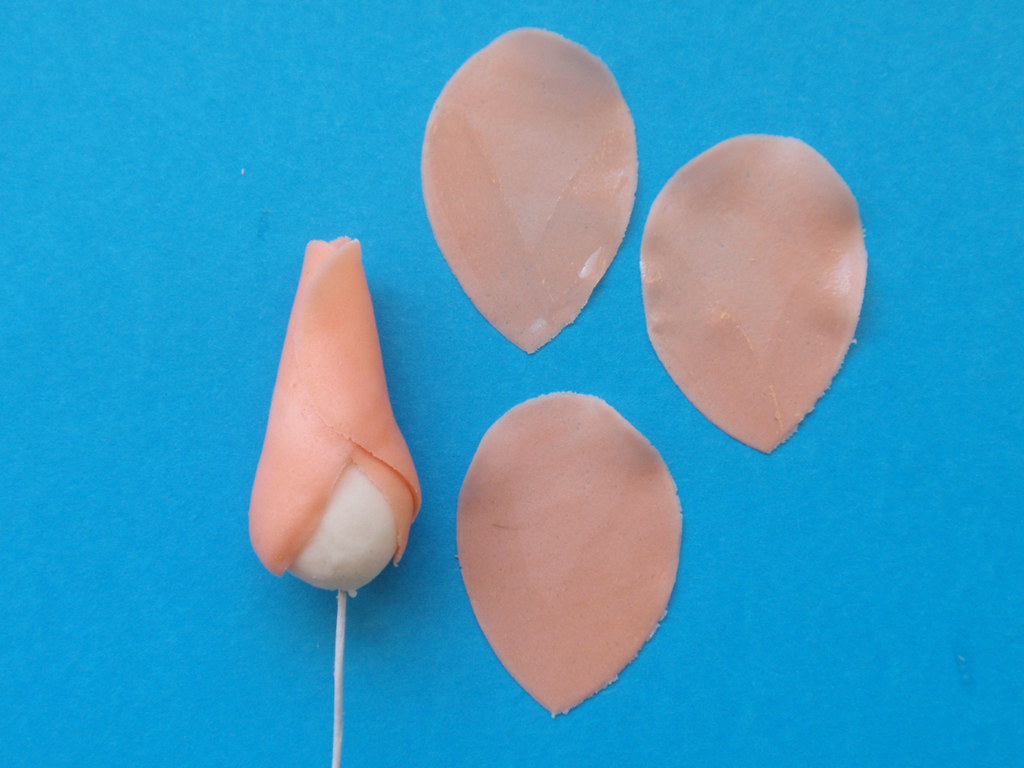
Lay the cone on the glued side of one of the petals again always making sure that the tops are level but only attach the left hand side of the petal at the moment.
Lay the cone on the glued left hand side of the second petal. The second petal should be tucked in under the first petal. Lift up and leave the right hand side unattached to the cone.
Pick up the third petal exactly as the first and second petal. The right hand side should still be unattached.
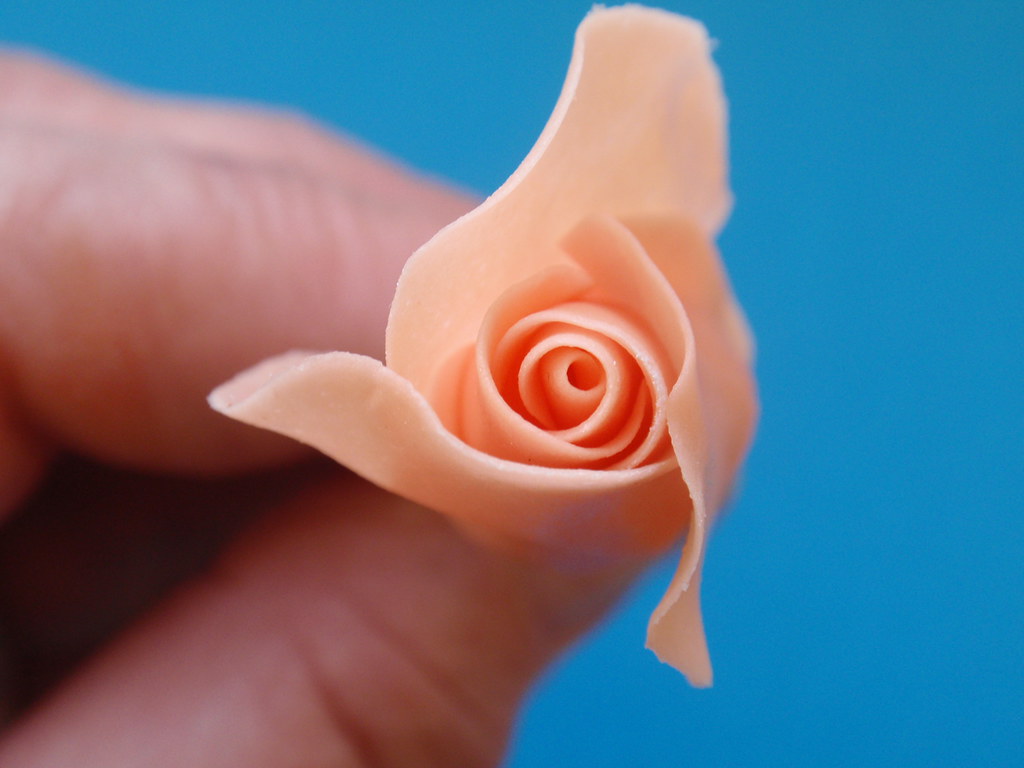
Wrap all three petals around each other making sure that the top is level.
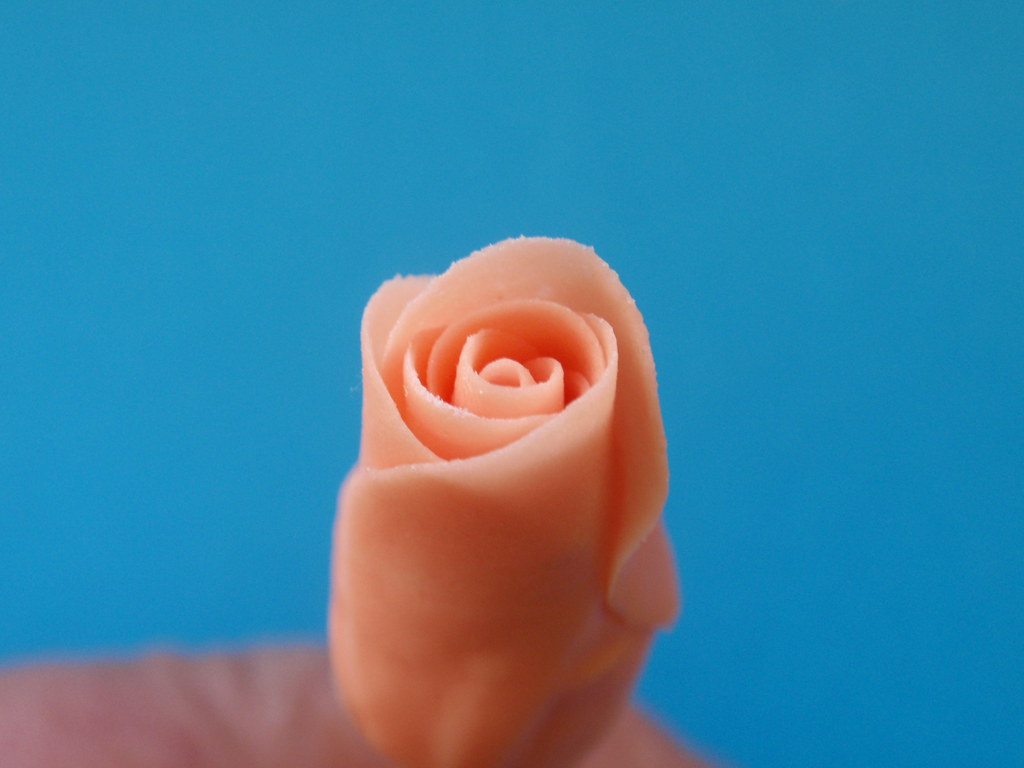
Layer 4
Lighten the colour again by adding white flower paste to the remaining coloured flower paste.
Cut another 3 petals using the same size cutter. Thin the petals, Turn the left side of one of the petals using a blunt toothpick to give it a curl. Do the same to the right hand side of the next petal and turn both sides of the next petal. Ball the centre of each petal to hollow the centre. Leave to stand for a couple of minutes.
Glue the bottom V of each petal.
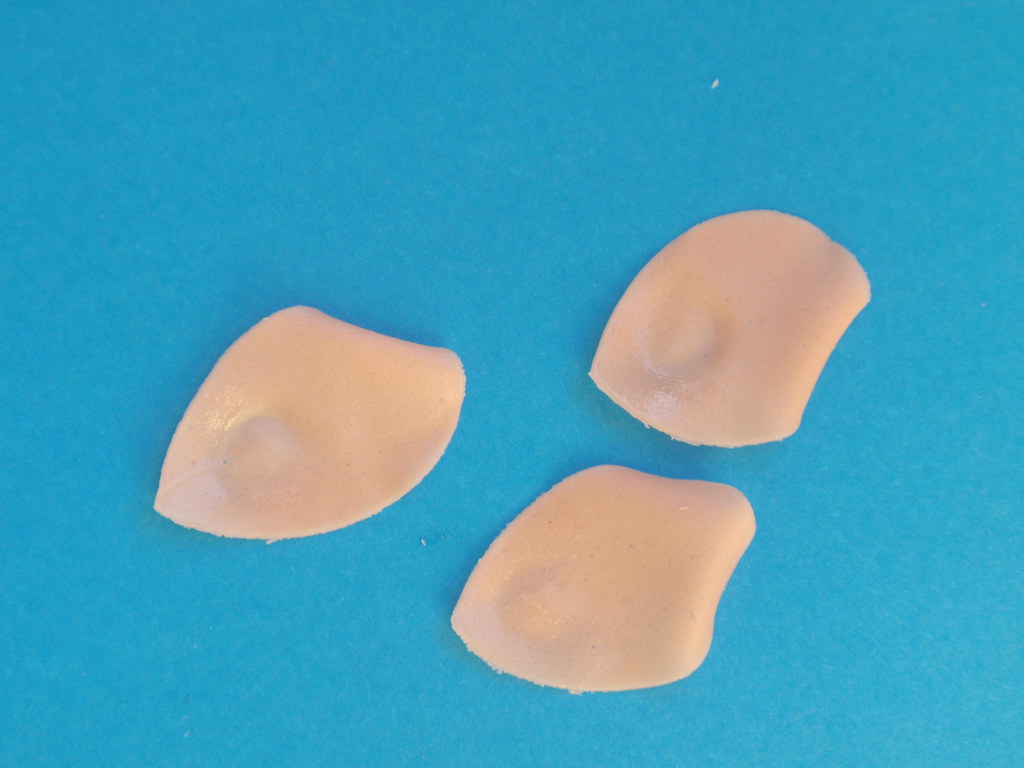
Pick up the petal with the left curl and attach it to the cone again making sure that it is level with the top.
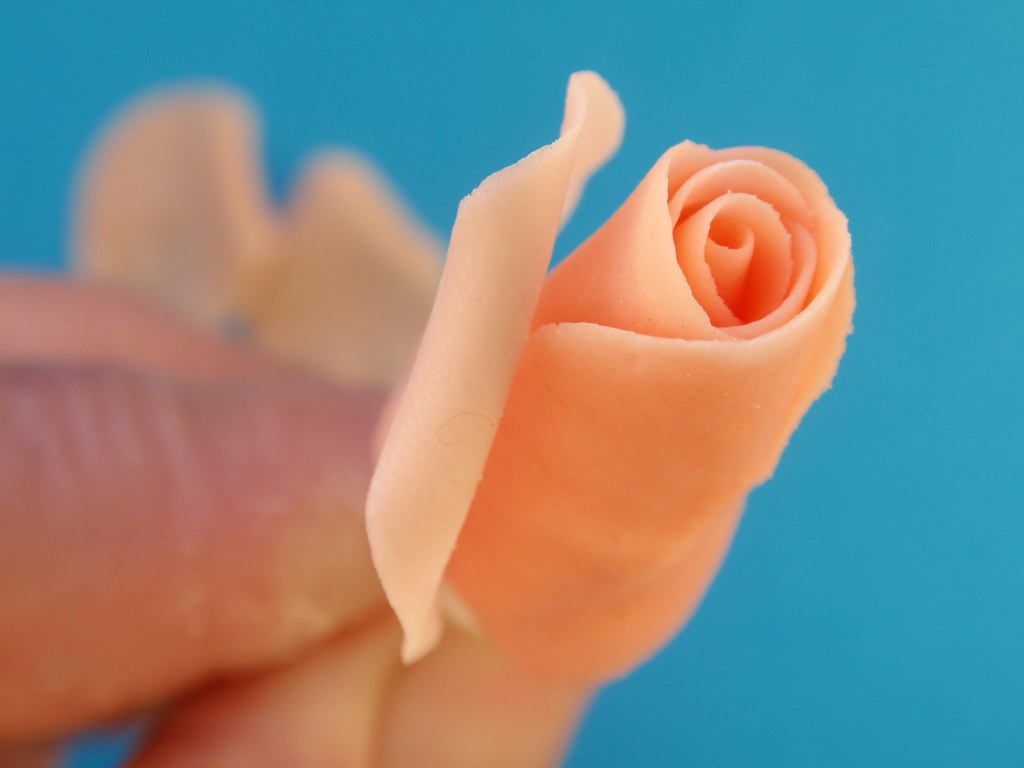
Pick up the second petal with both sides curled and attach it next to the first petal overlapping it slightly.
Take the third petal with the curl on the right hand side and attach to the cone overlapping the middle petal and meeting or overlapping the first petal on the other side. Attach the petals together this time not too tightly.
Layer Five
Lighten the flower paste again using white flower paste mixed with left over peach. Cut 5 petals using the same cutter. Thin the edges and curl each petal this time you can curl any side or curl both sides. Ball tool the centre to make the centre hollow. Glue the bottom V of each petal .
Attach each petal to the cone, leaving each petal as open as possible. Overlap each petal and tuck the last petal underneath the first one. Leave to dry by hanging it upside down.
If you prefer you can make another layer of 6 petals for a full blown rose but you only need one of these flowers for a focal rose.
Caylx
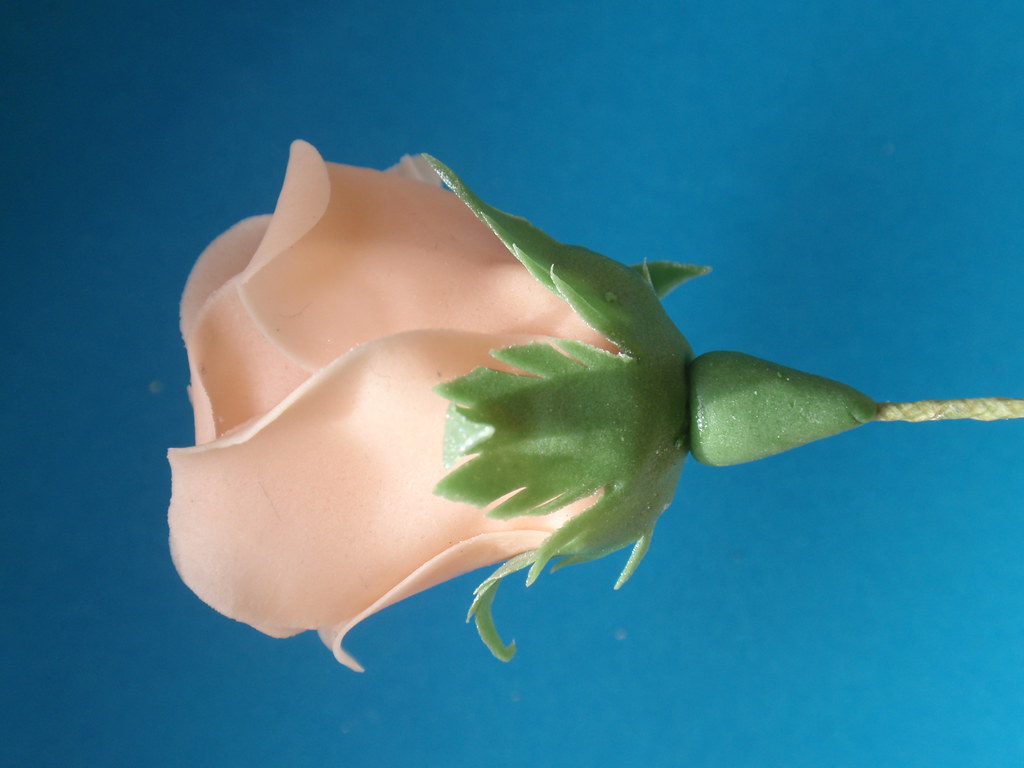
Use flowerpaste coloured with spring green and ruscus powder. Use a calyx cutter to cut one calyx. Use some paste to make a small cone of flowerpaste. Thin the edges of the calyx and cut slits on the side of each sepal.
Turn the calyx over and dust with silver or lustre powder.
Tape the full rose using Nile coloured tape and going all the way down the wire.
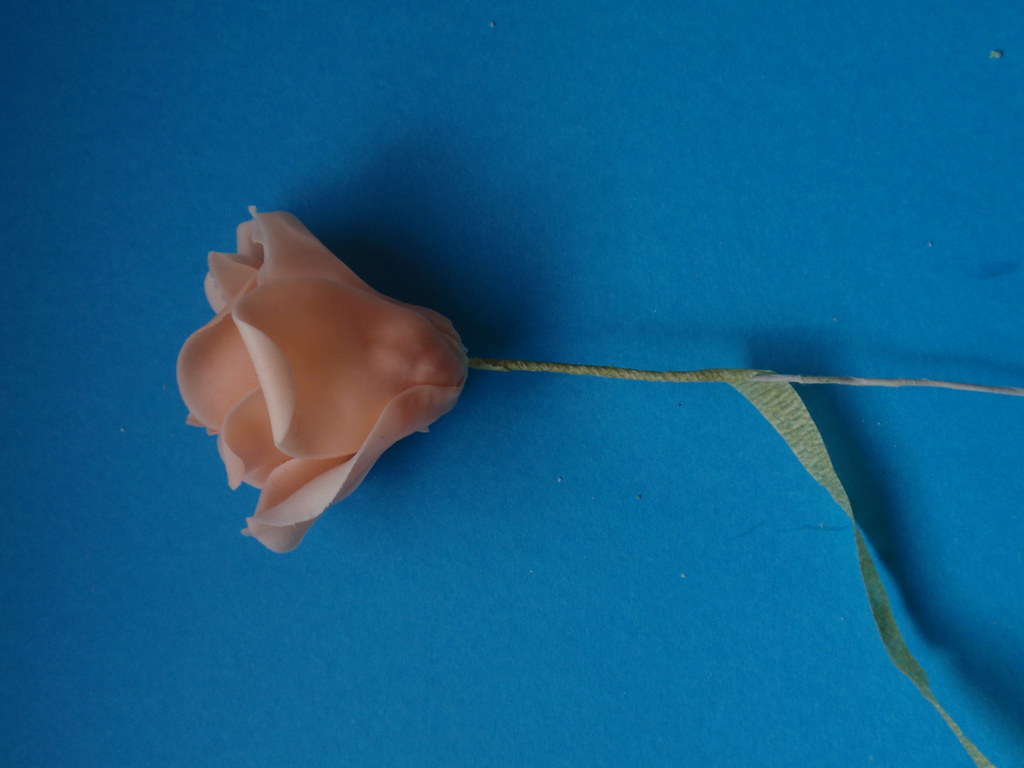
Turn the calyx over and hollow the centre of each sepal. Turn over and glue the centre of the calyx.
Attach to the bottom of the rose with the lustre side against the rose. Leave the sepals slightly bent away from the rose.
Put some glue at the top of the small cone. Attach to the top of the rose and below the calyx.
I have not taken pictures of the finished rose, but the tips of the petals need to be dusted with a darker peach dusting powder to make it look more natural. Finally steam the rose to fix the powder. I shall try and upload the pictures if I can take the pictures.
For a rose bud I usually make petals up to layer 3.
For a half rose I usaully make petals up to layer 4.
For a full rose I usually make petals up to layer 5.
For a full focal rose I usually add another layer (6) of 6 petals.
03 March 2010
Christmas Rose
Stamens
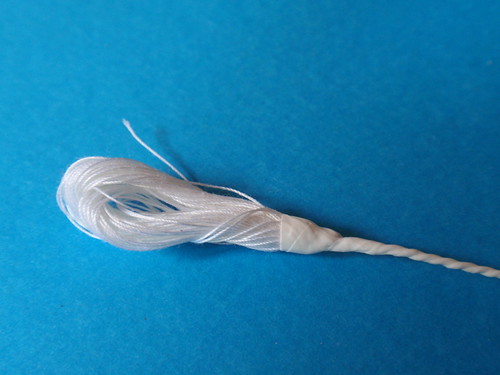
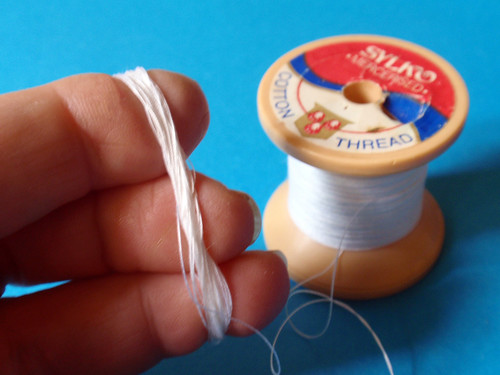
Wrap a length of white cotton thread round 3 fingers about 30 times.
Twist cotton to make into a shape of an 8 and fold into 2 loops.
Push 28 gauge wire cut into 3 through the loop and twist tightly to fasten the loop.
Tape using half width white tape starting from just above the twist. This will help keeping the stamens together.
Cut through the top loop and trim to about 1cm.
Dust with light green dusting powder.
Brush the tip of the stamens with edible glue and dip in sugartex (or other edible pollen).
Petals
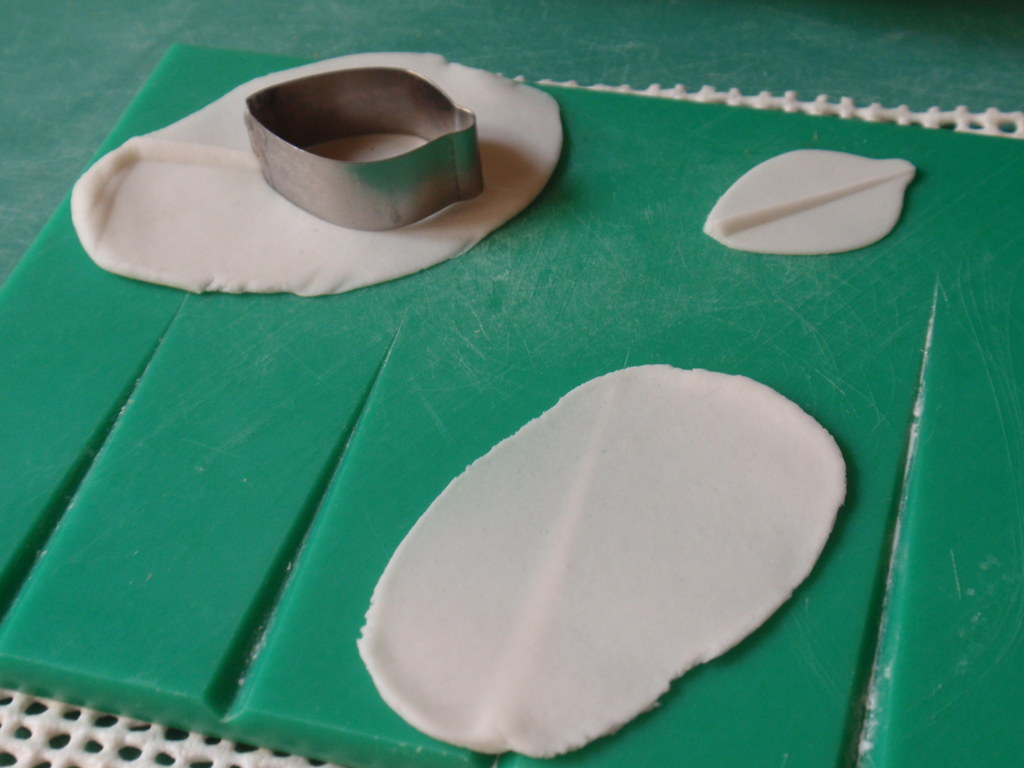
Roll out a small piece of white flower paste on a ridged board. Turn over and cut out the petal with the “node” end at the thin edge of the ridge.
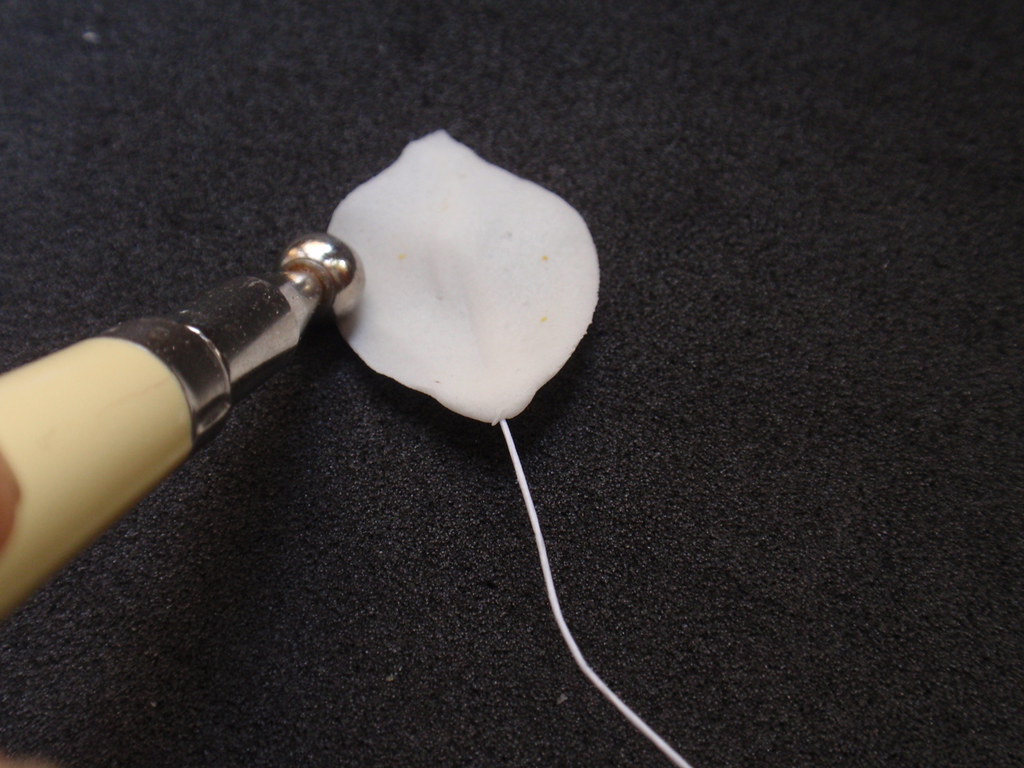
Insert 28gauge wire cut in 3, half way up the petal through the thick end of the ridge. Thin the edges using a ball tool on a cel pad.
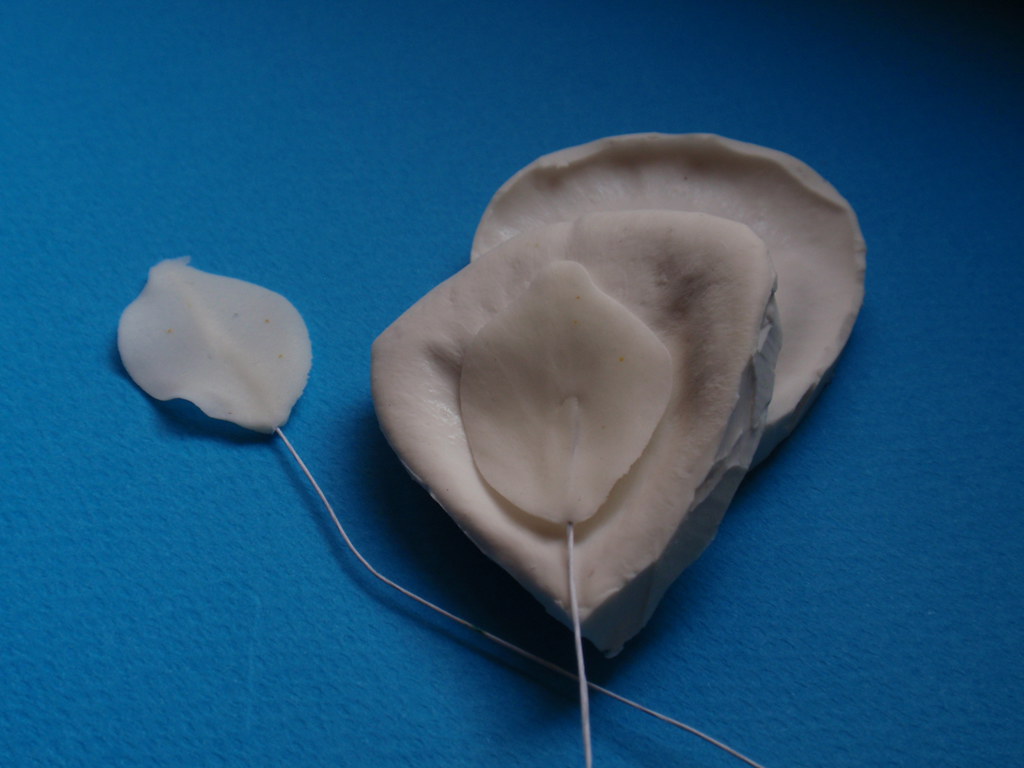
Vein the petal using a rose veiner. Make sure that the middle ridge is flattened.
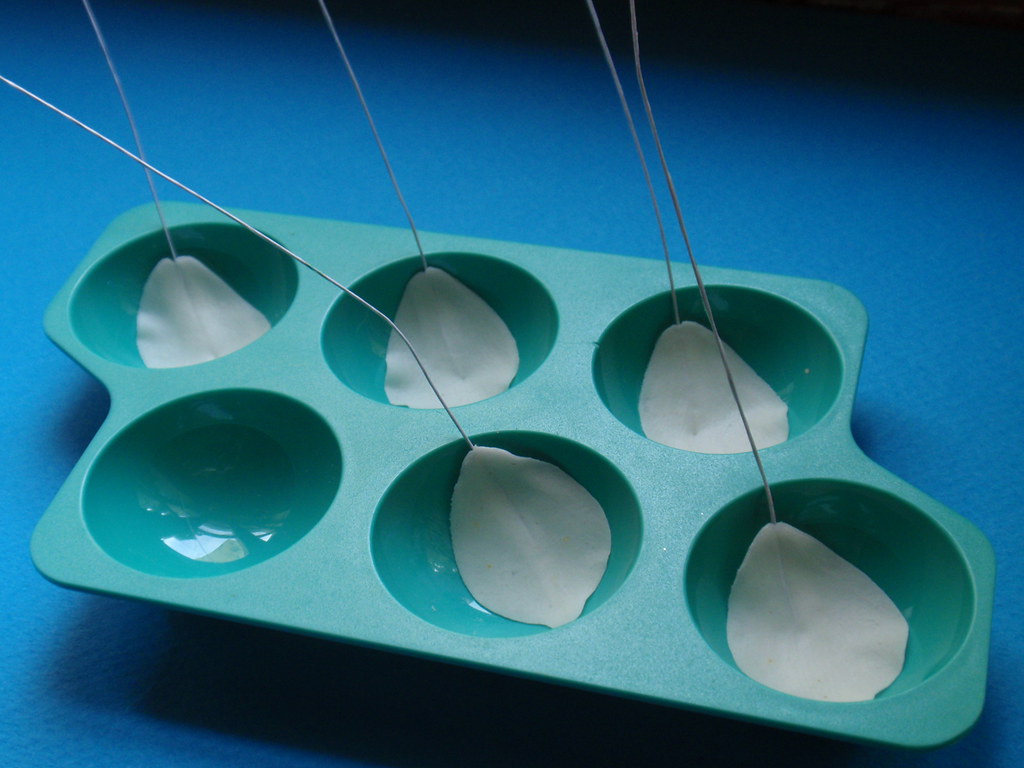
Make 5 petals. Place all the petals in an egg tray or something similar to cup the petals and give them shape. Leave till the petals are almost dry.
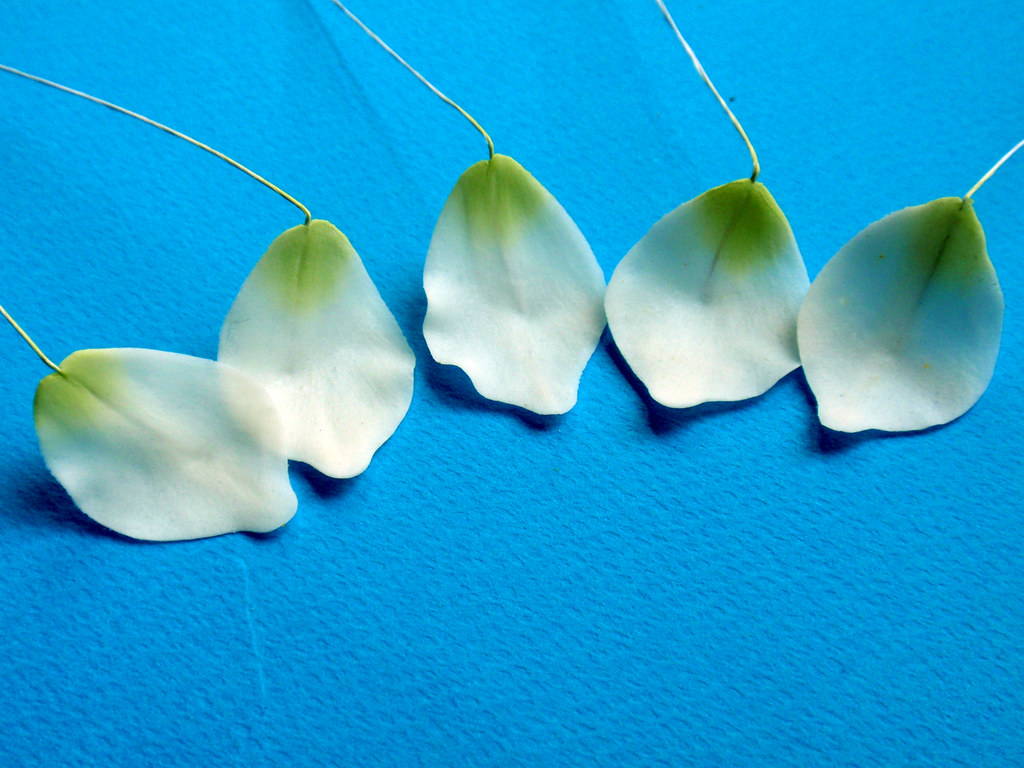
Brush the bottom back and front of each petal with light green (Orchid white) dusting powder. Steam to fix the colour.
Assemble the petals. Tape a petal at a rime round the stamens and tape to the bottom of the wire when all five petals are in place.
Place in a former and leave to dry completely.
Wrap a length of white cotton thread round 3 fingers about 30 times.
Twist cotton to make into a shape of an 8 and fold into 2 loops.
Push 28 gauge wire cut into 3 through the loop and twist tightly to fasten the loop.
Tape using half width white tape starting from just above the twist. This will help keeping the stamens together.
Cut through the top loop and trim to about 1cm.
Dust with light green dusting powder.
Brush the tip of the stamens with edible glue and dip in sugartex (or other edible pollen).
Petals
Roll out a small piece of white flower paste on a ridged board. Turn over and cut out the petal with the “node” end at the thin edge of the ridge.
Insert 28gauge wire cut in 3, half way up the petal through the thick end of the ridge. Thin the edges using a ball tool on a cel pad.
Vein the petal using a rose veiner. Make sure that the middle ridge is flattened.
Make 5 petals. Place all the petals in an egg tray or something similar to cup the petals and give them shape. Leave till the petals are almost dry.
Brush the bottom back and front of each petal with light green (Orchid white) dusting powder. Steam to fix the colour.
Assemble the petals. Tape a petal at a rime round the stamens and tape to the bottom of the wire when all five petals are in place.
Place in a former and leave to dry completely.
Subscribe to:
Posts (Atom)